

Most people think nail art is a talent you’re born with. They assume if they can’t draw a perfect circle on paper, they have no business touching a detailing brush. That is a mistake. Nail art isn’t about being an illustrator; it’s about chemistry, physics, and having the right tools. If you are struggling, it is probably because your polish viscosity is wrong or your light isn’t powerful enough. Stop blaming your shaky hands and start looking at your process. We are going to break down the best nail art designs for girls this year, focusing on recipes you can actually execute at home without a degree in fine arts.
Debunking the Professional-Only Myth of Complex Nail Art
The biggest lie in the beauty industry is that you need a salon chair to get high-end results. You don’t. You need patience and a dehydrator. Most beginners fail because they skip the boring steps. They see a photo of a complex design and try to replicate it on a nail plate that still has oils on it. The polish slides. The lines blur. They give up. If you want your art to look professional, you have to treat the prep work like a laboratory experiment. Clean the cuticle, buff the shine, and use a high-quality primer. Without this, even the most expensive design is just temporary clutter on your fingertips.
Another misconception is that more polish equals better art. It’s the opposite. Thick layers lead to bubbling and peeling. Professionals use thin, pigmented layers that cure quickly. If your polish takes five minutes to dry, it’s too thick. If it wrinkles under a UV lamp, it’s too thick. We are moving toward a “recipe-based” approach to nail art where measurements and timing matter more than artistic flair. This shift makes complex looks accessible to anyone who can follow instructions. Forget about “vibes” for a second and focus on the technical specs of your products.
Minimalist Nail Art Recipes for the Understated Professional
Minimalism is dominating the 2024 scene. It’s clean, it’s fast, and it doesn’t look dated after three days. The goal here is to enhance the natural nail shape rather than hide it. Think of this as the “no-makeup” makeup look for your hands. It requires precision, but the actual designs are mathematically simple. You aren’t painting a mural; you’re placing a few strategic marks.
The Micro-French Recipe
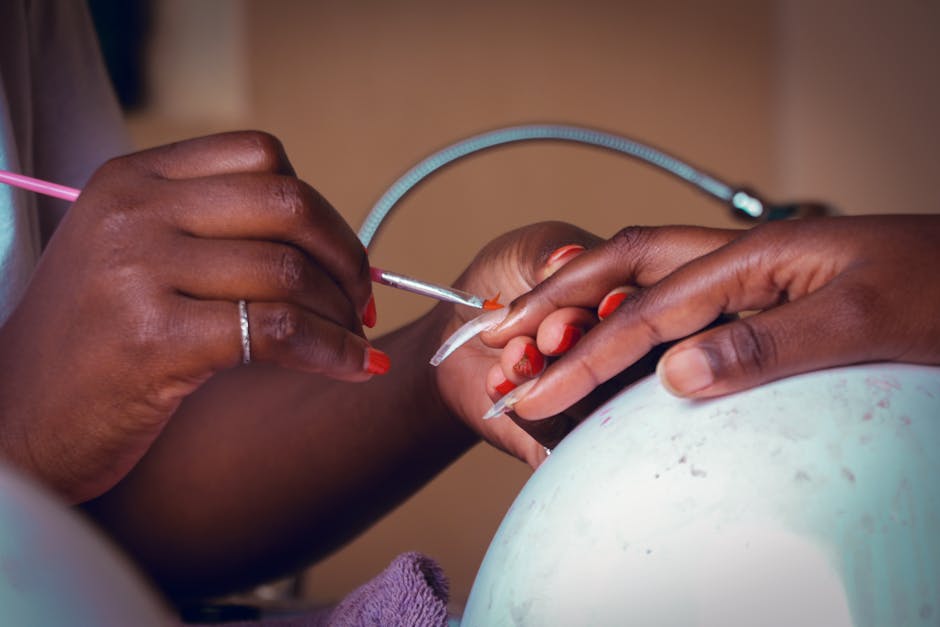
The traditional French manicure is dead. The Micro-French—a line so thin it’s almost invisible—is the replacement. To do this, do not use the brush that comes in the bottle. It’s too big. Use a 5mm detailing brush. Dip just the tip into a highly pigmented white or neon gel. Rest your pinky finger on the table to stabilize your hand. Instead of moving the brush across the nail, hold the brush still and rotate your finger. This creates a much cleaner arc. If you mess up, use a clean brush dipped in rubbing alcohol to “carve” the line back into shape. It’s a subtractive process as much as an additive one.
Geometric Negative Space
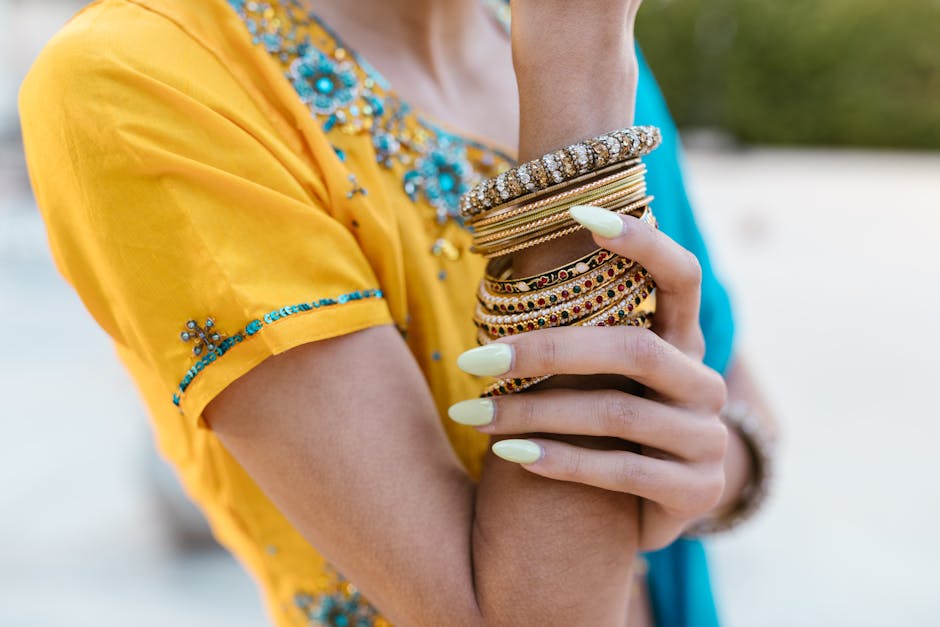
Negative space designs use your natural nail color as part of the art. The most effective version right now is the single vertical line or the offset dot. For the dot, use a dotting tool—or the end of a bobby pin if you’re on a budget. Place one single dot of a contrasting color (like deep navy or forest green) near the cuticle of the ring finger. That’s it. It’s intentional. It’s modern. It takes thirty seconds. For the vertical line, use a long striper brush. Start at the cuticle and pull toward the tip in one fluid motion. If you hesitate, the line will wobble. Speed is your friend here.
Mastering High-Gloss Textures: Chrome and Glazed Donut Recipes
Texture is the new color. Chrome powders have changed the game because they allow for a metallic finish that traditional polish simply cannot replicate. But chrome is finicky. If you apply it over the wrong base, it just looks like glitter. If you don’t seal it correctly, it rubs off within hours. This is the “Glazed Donut” look that remains a staple for girls who want a clean but high-impact aesthetic.
The Perfect Chrome Application Recipe
- Apply your base color and cure. For a classic pearl look, use a sheer white or nude.
- Apply a no-wipe top coat. This is non-negotiable. If the top coat has a sticky residue, the chrome will not mirror.
- Cure for exactly 30 seconds. If you over-cure, the powder won’t stick. If you under-cure, the powder will sink into the gel and look muddy.
- Use a silicone applicator or a sponge eyeshadow brush to buff the powder onto the nail. Use firm, circular motions until you see your reflection.
- Clean the excess powder off the surrounding skin with a soft brush.
- Seal with another layer of top coat, making sure to cap the free edge of the nail. This prevents the chrome from chipping at the tips.
Magnetized Velvet (Cat Eye) Designs
Cat eye polish contains magnetic metal particles. When you hold a magnet over the wet polish, the particles move, creating a velvet-like texture that shifts in the light. To get the best result, do not just hold the magnet in one spot. Move it around the edges of the nail to push the shimmer toward the center. This creates a “3D” effect that looks like expensive fabric. It’s a high-tech design that requires zero drawing skill. You are literally using physics to create the art. Just make sure you cure the nail immediately after using the magnet, or the particles will start to drift back to their original positions.
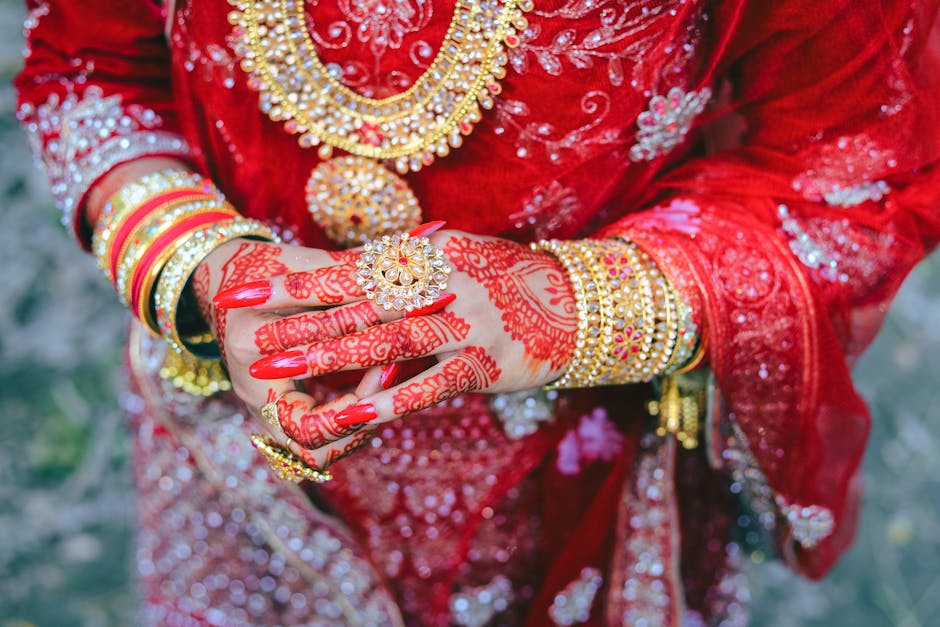
Maximalist 3D Art: Recipes for Charms, Bows, and Gems
If minimalism isn’t your style, 3D art is the alternative. This is about volume. We are seeing a massive trend in “Coquette” aesthetics, which involves 3D bows, pearls, and hearts. It’s impractical for everyday tasks like opening soda cans, but for an event or a photoshoot, it’s unbeatable. The secret to 3D art isn’t the charms themselves; it’s how you attach them. Most people use regular nail glue, which is too brittle. You need a dedicated rhinestone gel or a thick builder gel.
Securing 3D Charms That Actually Stay On
Don’t just plop a charm onto a finished nail. It will pop off the first time you reach into your bag. Instead, follow this recipe. Apply a small bead of Makartt Rhinestone Glue ($10-$15) to the spot where you want the charm. This glue is thick—it has the consistency of toothpaste. Press the charm into the glue. Use a small brush to wipe away any excess that oozes out. Cure for 60 seconds. For extra security, take a thin detailing brush and run a tiny bit of top coat around the base of the charm. This “anchors” it to the nail. It creates a seal so hair and lint don’t get caught underneath.
Note this: 3D charms change the weight distribution of your nail. If you have natural nails, keep the charms small. If you have long acrylics or gel extensions, you can go bigger. Putting a heavy metal bow on a short, natural nail is a recipe for a painful break.
The Jelly Nail Layering Technique
Jelly nails are translucent, colorful, and look like hard candy. They are the perfect base for 3D art. You can buy jelly polish, or you can make your own by mixing a drop of highly pigmented color into a clear top coat. This allows you to control the opacity. Layering is key here. Apply one thin coat of jelly, then a few small glitter flakes, then another coat of jelly. This creates depth. It looks like the glitter is floating inside the nail rather than sitting on top of it. It’s a sophisticated way to do “sparkle” without it looking like a craft project.
Essential Nail Art Tool Comparison: Kits That Actually Work
Stop buying the $2 nail art kits from the discount bin. The brushes shed, the paint is watery, and you’ll end up frustrated. If you want to do this right, you need tools that can hold a point and polish that actually cures. Here is a breakdown of what’s actually worth your money in 2024.
| Product Name | Approx. Price | Pros | Cons |
|---|---|---|---|
| Beetles Gel Polish Starter Kit | $35 – $45 | Includes lamp, tools, and 20+ colors. Great for beginners. | Bottles are very small; brushes are average quality. |
| Holo Taco Detail Brush Set | $15 – $20 | Extremely fine bristles; holds shape well after cleaning. | Often out of stock; handles are a bit thin for large hands. |
| Makartt Nail Extension Kit | $25 – $30 | Very strong; includes everything for building length. | Steep learning curve; requires a lot of filing. |
| Modelones Chrome Powder Set | $12 – $18 | Highly reflective; comes with multiple applicators. | Incredibly messy; will get everywhere if not careful. |
If you are serious, start with the Holo Taco brushes. They are the industry standard for a reason. A good brush can make mediocre polish look great, but a bad brush will ruin even the most expensive gel. When you’re done, never clean your brushes with pure acetone—it will fry the bristles. Use a bit of clear base coat to “rinse” the color out, then store them in a dark place away from UV light. If you leave your brushes near your curing lamp, the leftover gel inside them will harden, and you’ll have to throw the brush away. Don’t be that person.
The Science of Longevity: A Recipe for 3-Week Manicures
There is no point in spending two hours on a design if it’s going to lift in four days. Longevity is a result of proper dehydration and capping. Your nail plate naturally produces oils. These oils are the enemy of adhesion. Before you even touch a bottle of color, you need to scrub your nails with a 70% isopropyl alcohol solution. Some people use vinegar; don’t be one of them. Use the alcohol. It works.
The “Capping” recipe is the final step that most amateurs skip. When you apply your top coat, don’t just paint the top of the nail. Run the brush along the very edge of the tip. This creates a physical wrap of polish around the end of the nail. Since most chips start at the tip, this wrap acts as a shield. If you work on a computer all day, this is the only way your nail art will survive the constant friction of typing. Also, wear gloves when you do the dishes. Hot water and detergent are the fastest way to break the chemical bond between the gel and your nail. It’s common sense, but most people ignore it and then complain about “bad polish.” Be smarter than that.
Nail art is a skill, but more importantly, it’s a process. Whether you are going for a minimalist micro-French or a maximalist 3D charm look, the rules of prep and application remain the same. Buy the right brushes, respect the curing times, and stop rushing the prep work. Your nails are a 10-piece canvas; treat them with a bit of technical respect and they’ll look better than anything you’d get for sixty bucks at the mall.

 Banana Bread")
