

You spent 20 minutes blending a gradient eyeshadow look. You opened your eyes. The color disappeared. All that work, gone behind a fold of skin that ate every pigment you applied.
This is the core frustration of monolid makeup. Standard tutorials assume you have a visible crease to work with. Monolids don’t have one. The entire lid is one smooth surface from lash line to brow bone. Shadows vanish. Eyeliner transfers to the upper lid within an hour. Winged liner folds into a jagged mess.
The techniques that work for double eyelids are actively wrong for monolids. You need a different approach entirely. Here are 7 techniques that respect your eye shape and create visible, lasting depth.
Why Standard Eyeshadow Application Fails on Monolids
Most eyeshadow tutorials tell you to apply a medium shade in the crease and a dark shade in the outer V. That instruction assumes you have a visible crease to follow. On a monolid, there is no crease. The medium shade goes onto the lid, and when you open your eyes, it gets pressed against the brow bone by the overhanging skin.
The result is a single flat stripe of color across your upper lid. No depth. No dimension. Just a smear that looks nothing like the tutorial photo.
The fundamental problem is placement. On a monolid, the area that acts like a crease is actually the space above your natural lid, visible only when your eyes are closed. You need to place shadow higher than you think — roughly halfway between your lash line and brow bone — and blend upward, not downward.
Another issue: oil transfer. Monolids have more skin-to-skin contact, which means more friction and more oil migration. Cream shadows and soft powders migrate into the fold within hours. Urban Decay Eyeshadow Primer Potion ($14) is the single most effective fix for this. It creates a tacky, oil-resistant base that holds pigment in place for 12+ hours.
One more thing: avoid shimmery all-over lid shades. Shimmer emphasizes texture and makes the lid look puffier. Matte and satin finishes are your friends. They absorb light instead of reflecting it, creating the illusion of a recessed crease.
The Gradient Placement Method: Where Shadows Actually Go
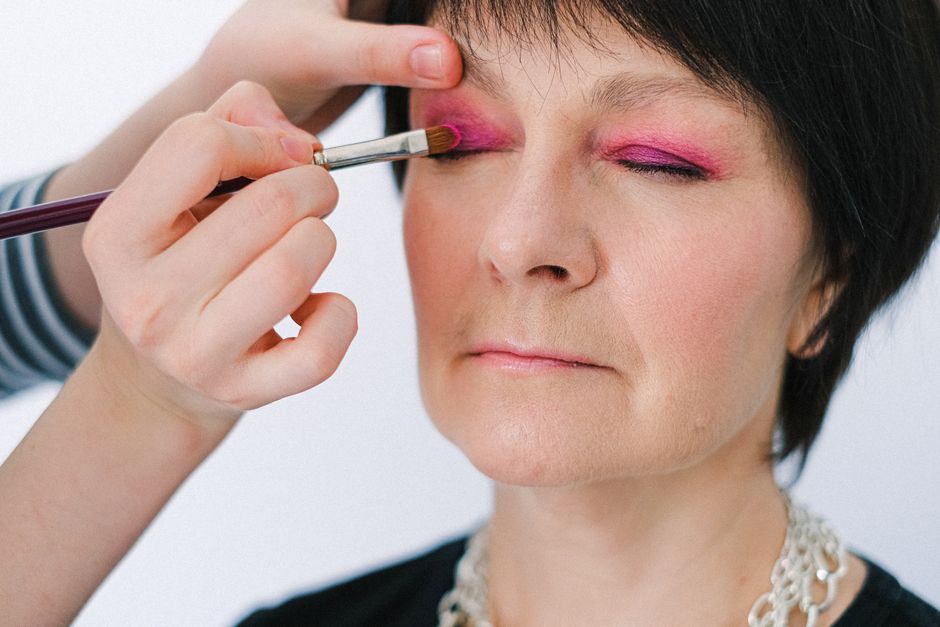
This technique reverses the standard order. Instead of dark in the crease and light on the lid, you place the darkest shade closest to the lash line and graduate to lighter shades as you move up.
Here is the exact placement for a 3-shadow monolid look:
- Transition shade (medium matte brown or taupe) — Apply with a fluffy brush directly above where your crease would be if you had one. On a monolid, this is the area that becomes visible when you look down. Blend upward toward the brow bone, not downward onto the lid. Keep it soft.
- Lid shade (medium-dark matte) — Apply this from the lash line up to the transition shade. This creates the gradient. Use a flat shader brush and pat the color on rather than sweeping.
- Outer corner dark shade (deep brown, charcoal, or plum) — Place this on the outer third of the lash line and blend upward and outward in a V shape. Keep the V elongated, not rounded. A rounded shape makes the eye look smaller.
When you open your eyes, the darkest part should be visible right at the lash line, and the transition shade should peek out above the fold. If you cannot see any shadow with your eyes open, you placed it too low. Move everything up by 3-4mm next time.
MAC Cosmetics Eyeshadow in Wedge ($10) is a perfect transition shade for fair to medium skin tones. For deeper skin, MAC Soft Brown works better. Both are matte, blendable, and buildable.
Eyeliner That Stays Visible and Doesn’t Smudge
This is the most common complaint I hear. You apply a perfect thin line along the lashes, open your eyes, and see nothing. So you make it thicker. Then thicker. Eventually you have a thick black band that transfers to your upper lid every time you blink.
The solution is counterintuitive: do not line the entire upper lash line. Instead, focus on the outer two-thirds. Start your line at the midpoint of the eye, not the inner corner. This keeps the line visible when your eyes are open because the thickest part is where the lid naturally lifts.
For the inner corner, use a tightlining technique. Lift your eyelid gently and apply liner to the waterline between the lashes. This creates the illusion of a full lash line without adding bulk to the visible lid.
Winged liner requires a different angle. Do not follow the lower lash line angle. Instead, draw the wing with your eye open, looking straight ahead. Mark the angle where the wing should go — it should point toward the end of your eyebrow, not upward at a 45-degree angle. A lower, flatter wing stays visible and doesn’t fold into the skin.
K-Palette 24H Real Lasting Eyeliner ($15) is a Japanese formula designed specifically for monolids. It dries to a waterproof film that does not transfer. Heroine Make Smooth Liquid Eyeliner ($12) is another solid option with a super-fine brush tip that allows precise application.
False Lashes That Lift Without Weighing Down the Lid

False lashes on monolids serve one purpose: they create the illusion of a crease by casting a shadow onto the lid. But most lashes are too heavy. They weigh down the lid, make the eye look smaller, and the band peels off within hours.
The rule is simple: choose lashes with a thin, invisible band and uneven lengths. Avoid thick crisscross bands. Avoid uniform-length lashes. What you want is a lash that is shorter on the inner corner and longer on the outer corner, with individual spikes rather than a solid wall of hair.
Dolly Wink No. 1 Sweet Girl ($12) is a Japanese brand that makes lashes specifically for Asian eye shapes. The band is almost invisible, and the lashes are spaced out so they look natural. Etude House Lash Perm Curl Fix Mascara ($10) is a good alternative if you prefer mascara only — it holds a curl all day without flaking.
Application tip: trim the lash band to fit your eye length exactly. Apply a thin layer of glue to the band, wait 30 seconds for it to become tacky, then place the lash as close to your natural lash line as possible. Press down gently for 10 seconds. Do not apply lashes that extend past your natural eye shape — they will catch on the upper lid and flip up.
Comparison: Best Eyeliners for Monolids
| Product | Price | Finish | Transfer Resistance | Best For |
|---|---|---|---|---|
| K-Palette 24H Real Lasting Eyeliner | $15 | Matte black | Excellent — zero transfer after 12 hours | Everyday wear, oily lids |
| Heroine Make Smooth Liquid Eyeliner | $12 | Glossy black | Very good — slight transfer if rubbed | Precise thin lines, winged liner |
| Stila Stay All Day Waterproof Eyeliner | $22 | Matte black | Good — transfers on very oily lids after 8 hours | Thicker lines, dramatic looks |
| Canmake Creamy Touch Liner | $8 | Matte dark brown | Moderate — needs setting powder on top | Soft natural looks, tightlining |
The clear winner for most monolids is the K-Palette 24H. It stays put through humidity, tears, and 12-hour days. The Heroine Make is better if you want a super-fine tip for precise wings. Avoid gel pot liners — they dry out quickly and require a separate brush, which adds bulk and makes precision harder.
The One Mistake That Ruins Every Monolid Look

I see this constantly. Someone applies a beautiful gradient shadow, perfect liner, and curled lashes. Then they take a photo. The eye looks smaller. The shadow is invisible. The liner is smudged.
The mistake: not prepping the lid properly.
Monolids have more surface area that touches other skin. This means more natural oil production. If you apply anything — primer, concealer, shadow — onto a bare lid that hasn’t been prepped, it will slide off within two hours.
Here is the exact prep routine that fixes this:
- Wipe the lid with a micellar water on a cotton pad to remove any residual oil. Bioderma Sensibio H2O ($15) works well and doesn’t irritate the eyes.
- Apply a thin layer of eyeshadow primer from lash line to brow bone. Let it sit for 30 seconds to become tacky.
- Set the primer with a translucent powder or a matte skin-toned shadow. This creates a dry, grippy surface that shadows stick to.
- Now apply your eyeshadow. It will stay in place for 10+ hours.
Skipping the powder step is the most common error. Primer alone is still slightly tacky. Adding powder creates a true dry base that prevents creasing and migration. Laura Mercier Translucent Loose Setting Powder ($40) is expensive but works perfectly for this. A cheaper alternative is Innisfree No-Sebum Mineral Powder ($8), which controls oil without adding texture.
Another mistake: using concealer as a primer base. Concealer is too emollient. It breaks down shadow within hours. Stick to dedicated eyeshadow primer.
Quick Reference: Monolid Eye Makeup Rules
Here is a condensed version of everything above. Save this for your next makeup session.
- Shadow placement: Apply transition shades higher than you think — halfway between lash line and brow bone. Darkest shade at the lash line, lightest at the brow bone.
- Eyeliner: Start at the midpoint of the eye, not the inner corner. Keep the wing flat and low. Tightline the inner corner.
- False lashes: Choose thin-band, uneven-length lashes. Trim to fit. Avoid heavy uniform lashes.
- Primer: Always use a dedicated eyeshadow primer. Set it with powder before applying shadow.
- Finishes: Stick to matte and satin. Shimmer emphasizes texture and puffiness.
- Mascara: Use a waterproof, curl-holding formula. Heroine Make Long and Curl Mascara ($14) holds a curl on straight lashes better than any other drugstore option.
- Tools: Use a fluffy blending brush for transition shades and a flat shader brush for lid colors. Avoid sponge-tip applicators — they deposit too much product and blend poorly.
These techniques are not about fighting your eye shape. They work with it. Once you adjust your placement and prep, monolid makeup becomes straightforward. The depth is there. You just need to put the color in the right place.


